Bitbrowser Proxy Configuration Guide
Bitbrowser is a professional fingerprint browser tool focused on e-commerce and social media account management. This tutorial will guide you on how to configure OkkProxy in Bitbrowser.
Watch Full Video Tutorial
Prerequisites
Bitbrowser client installed
OkkProxy account with available proxy services
Obtained proxy server address and authentication information
Configuration Steps
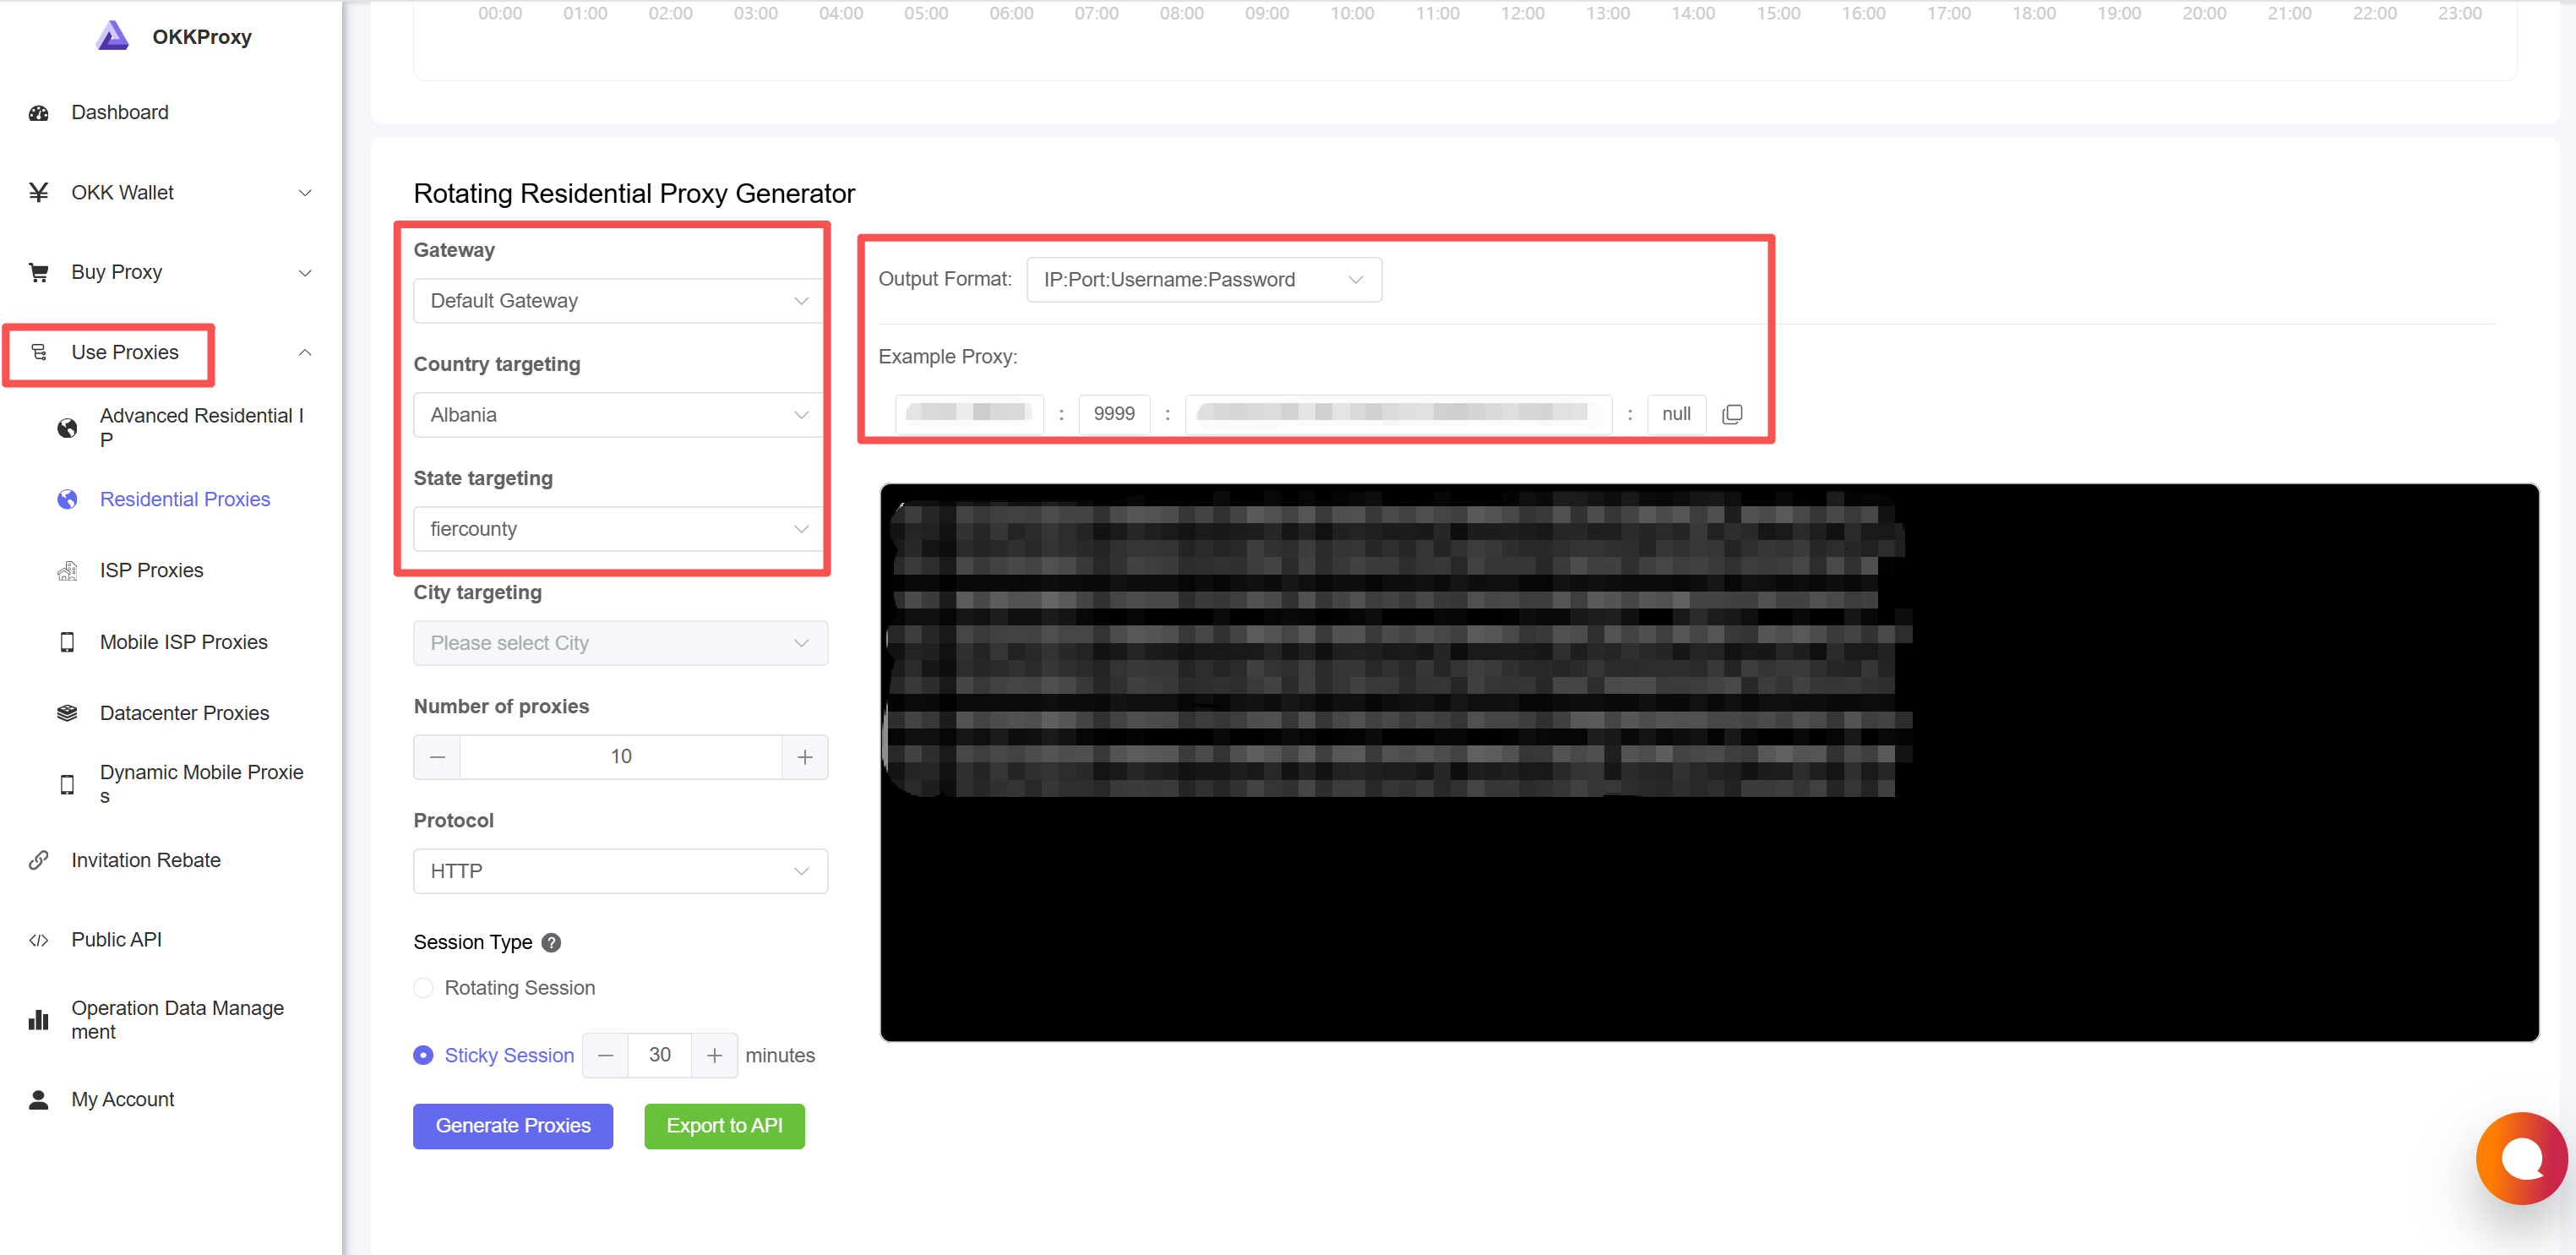
Step 1: Get Proxy Information
- Log in to OkkProxy management panel 2. Go to "Proxy Management" page
- Record the following information:
- Proxy server address: Gateway address
- Port number: Port number
- Username: Your username
- Password: Your password
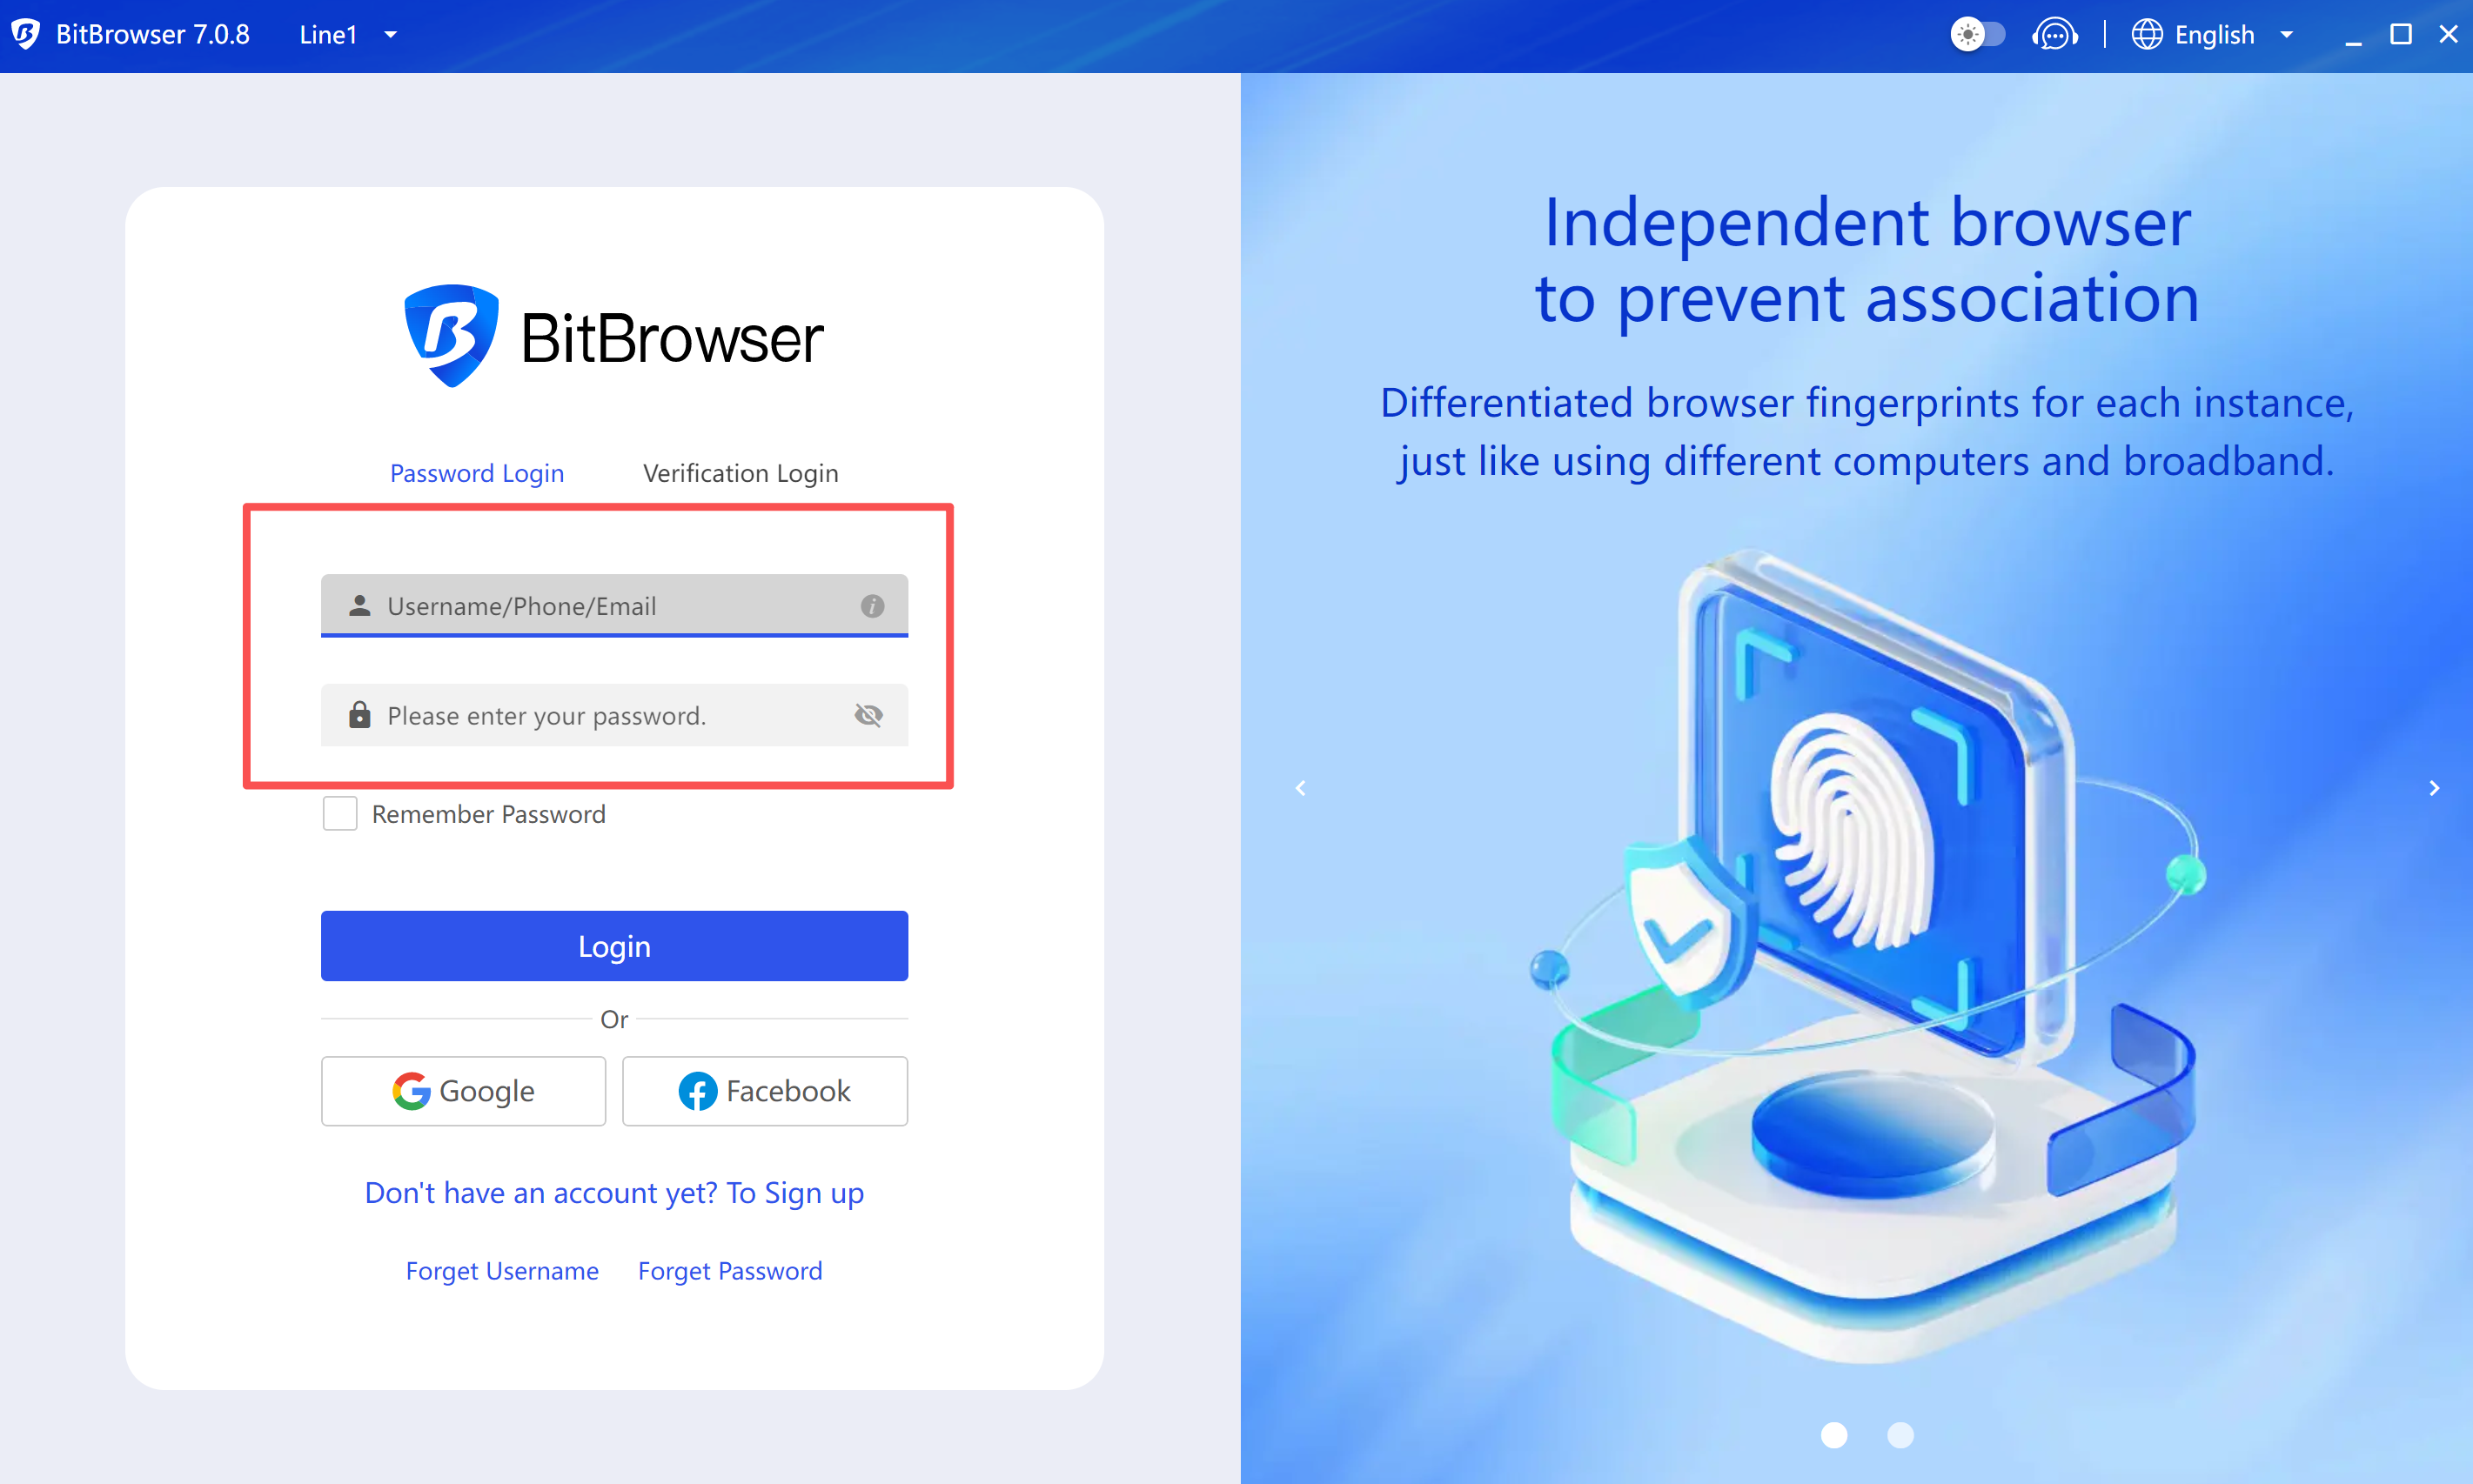
Step 2: Open Bitbrowser
Launch Bitbrowser application(https://www.bitbrowser.net/)
Log in to your Bitbrowser account
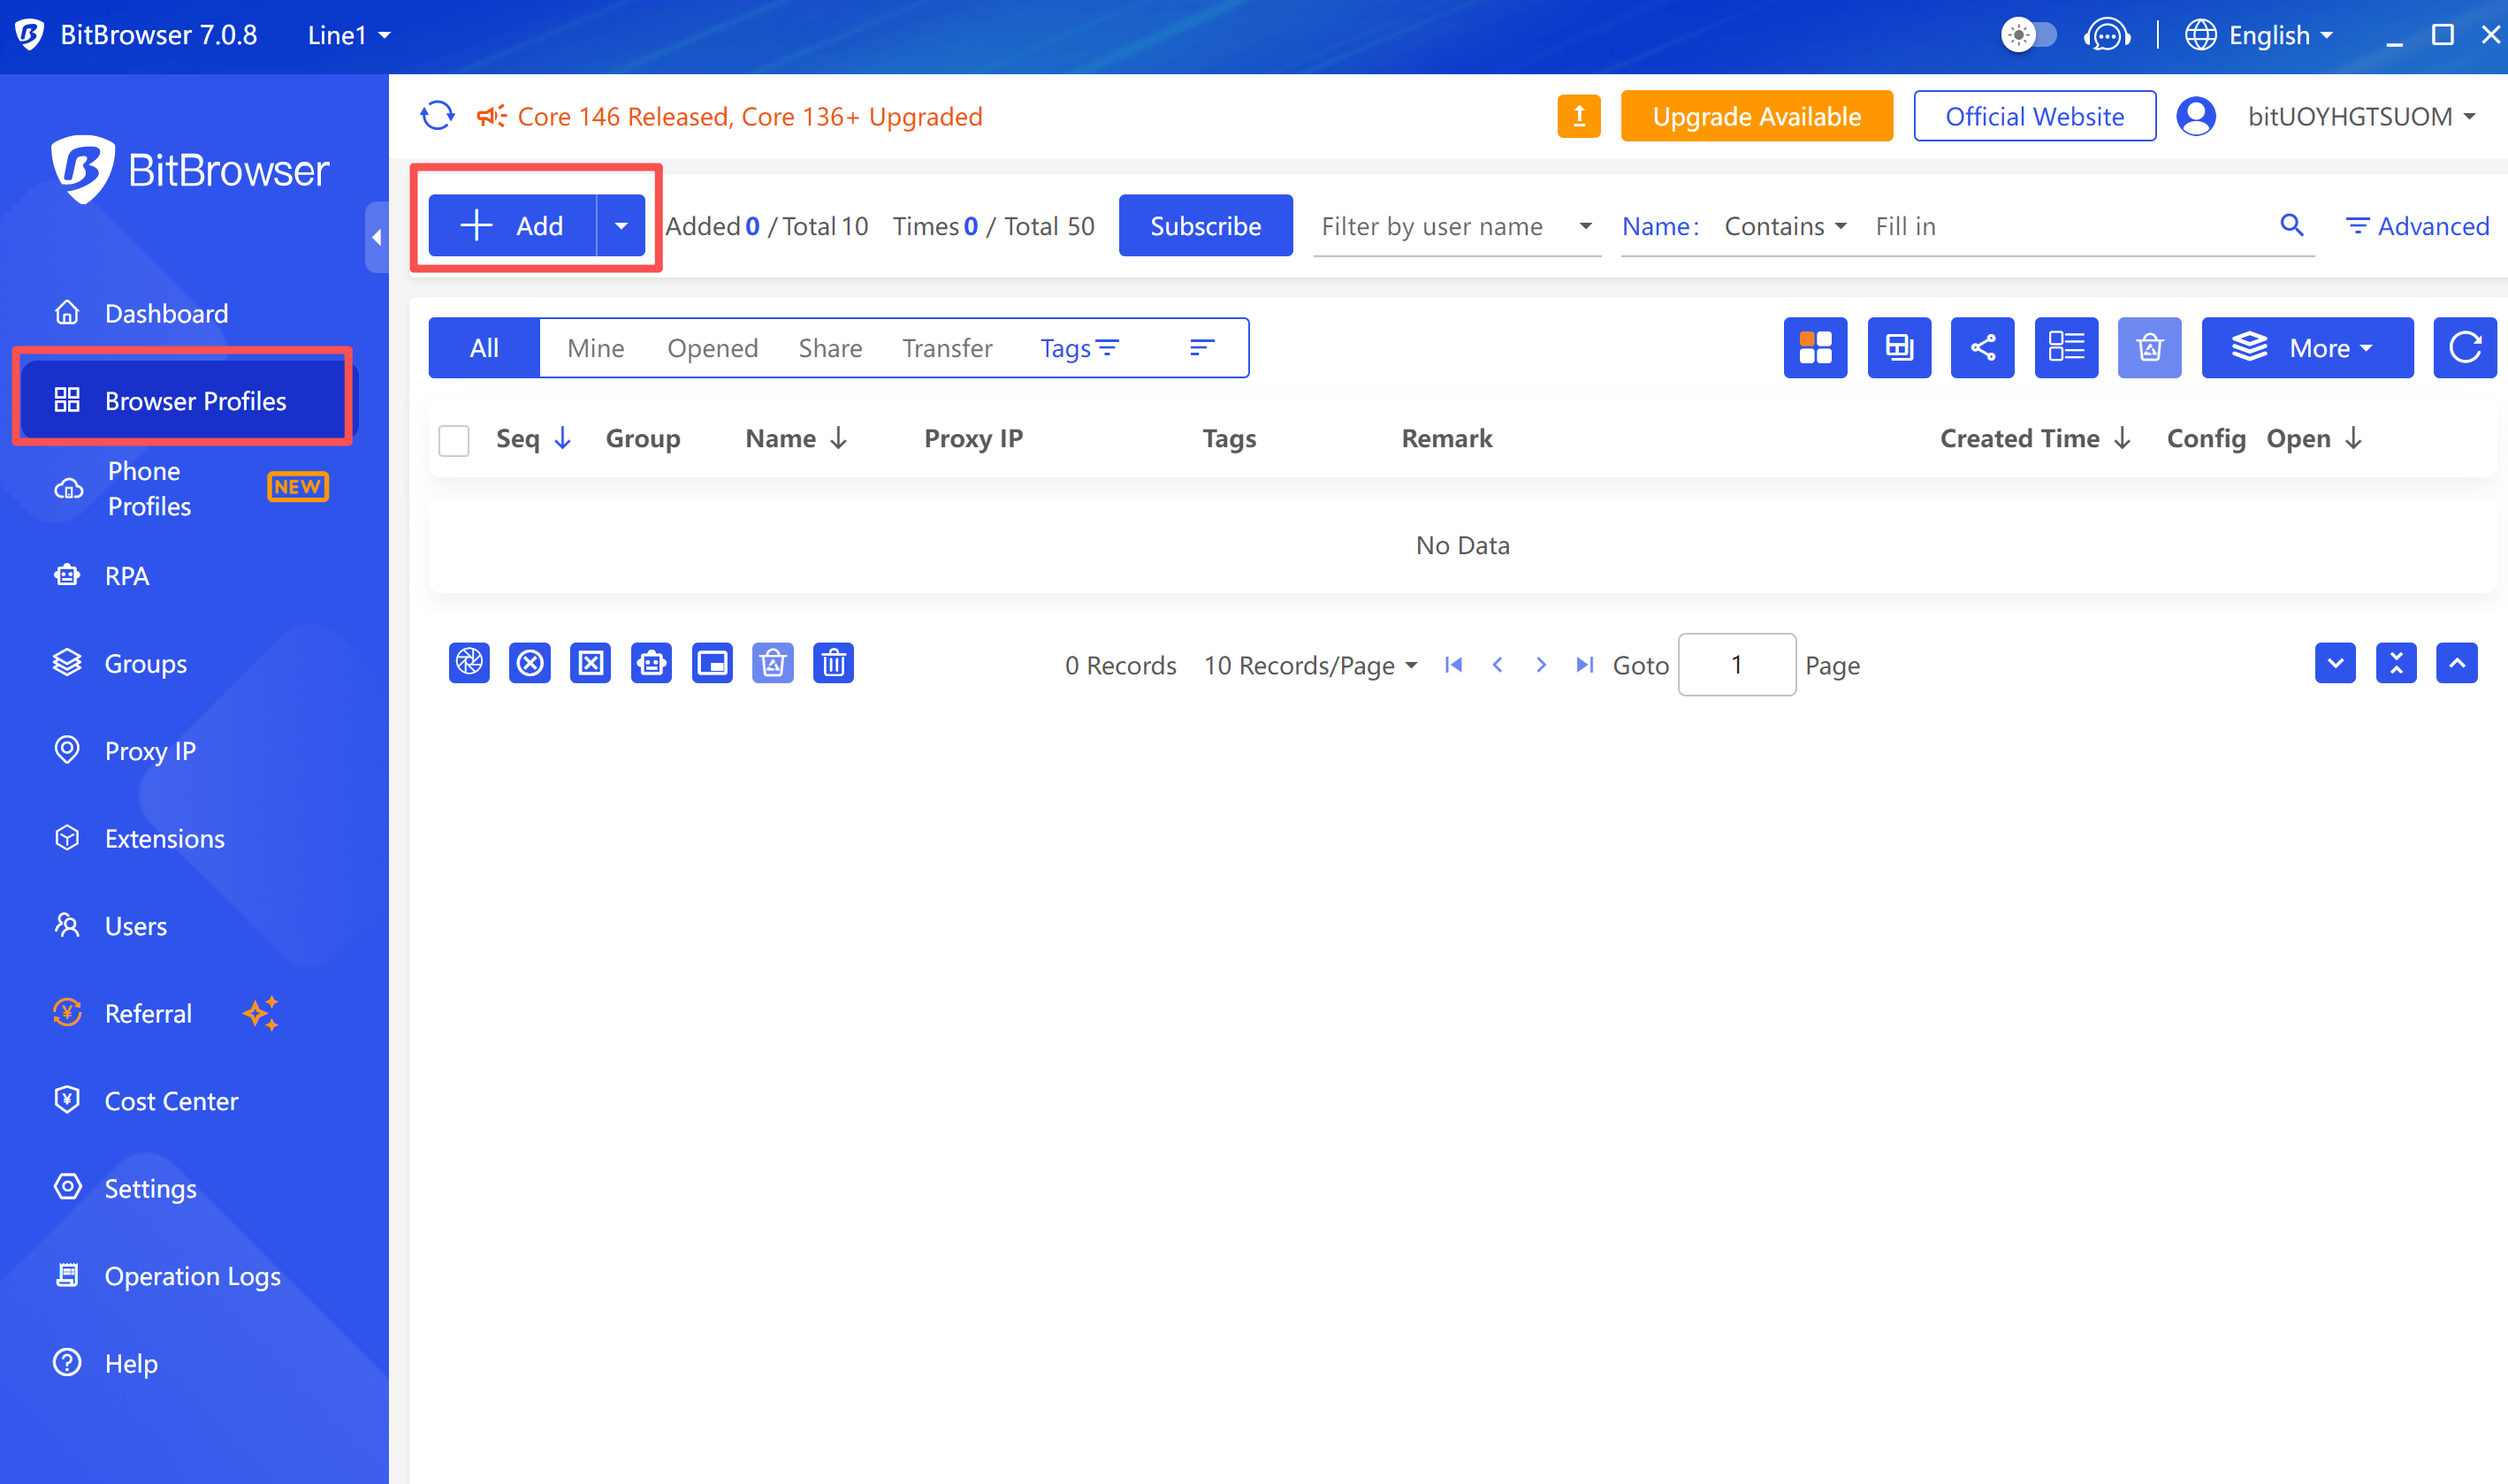
Step 3: Create New Browser Profile
Click the "New Browser" button on the main interface
Or edit an existing browser profile
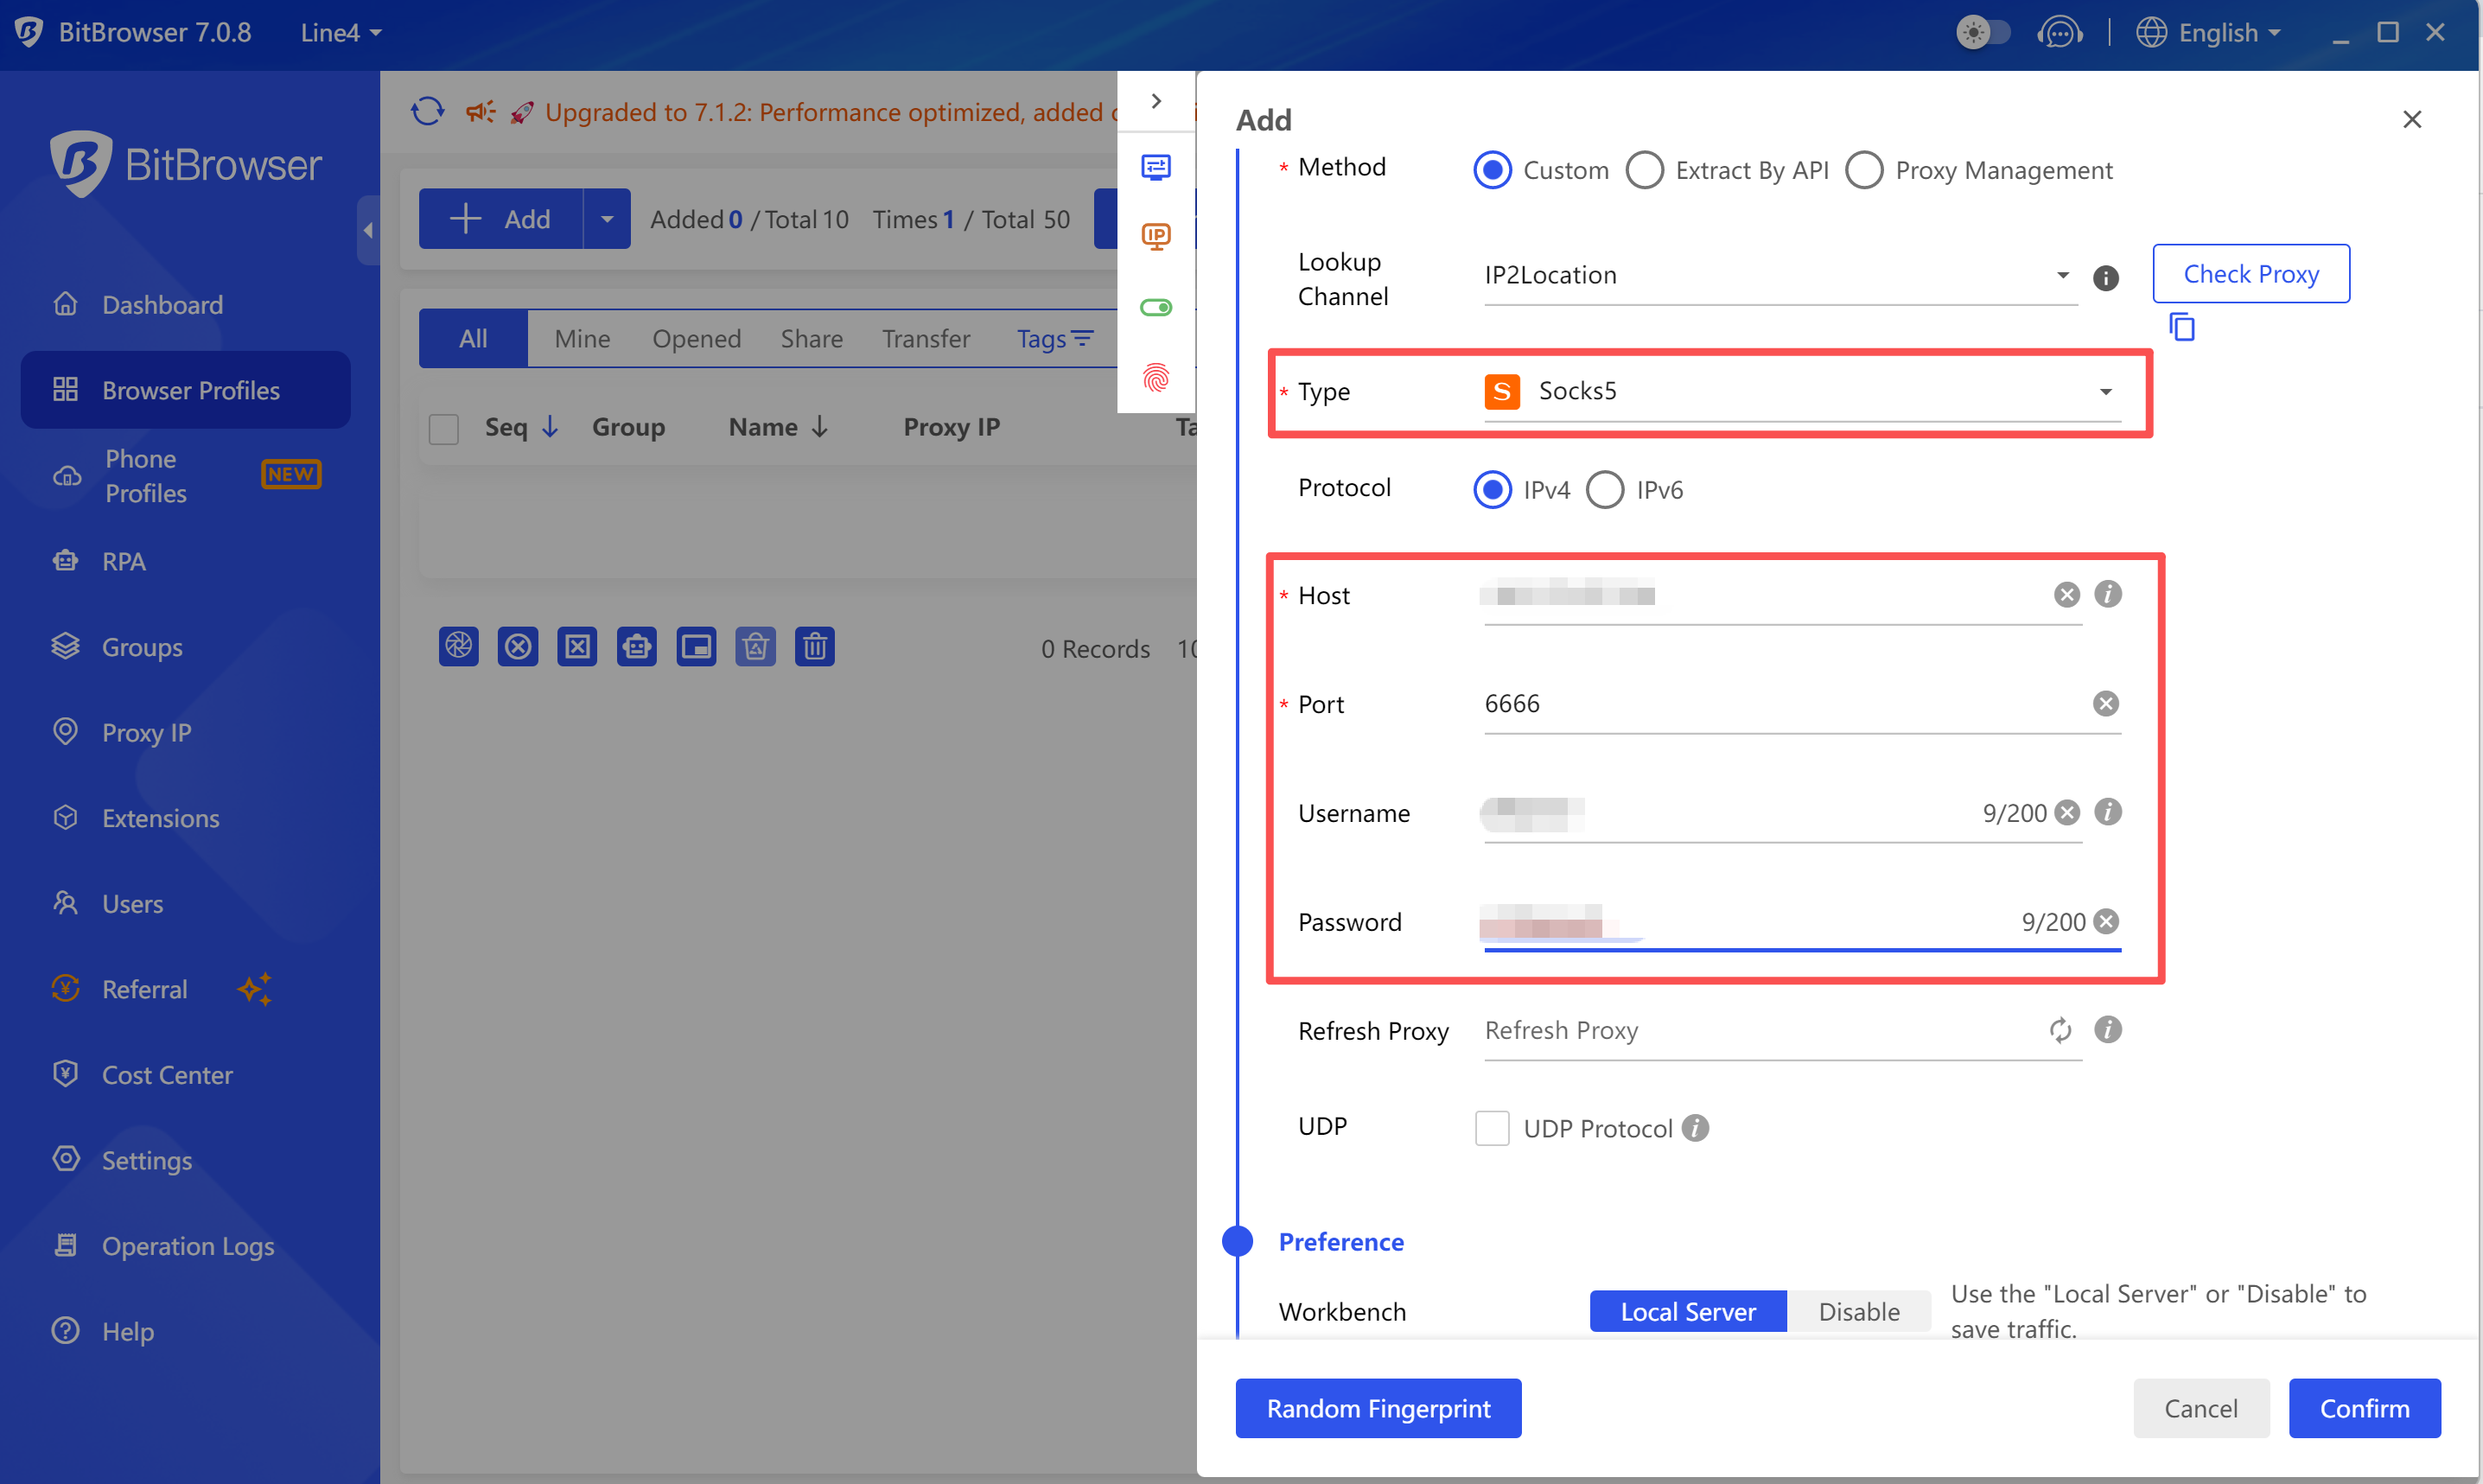
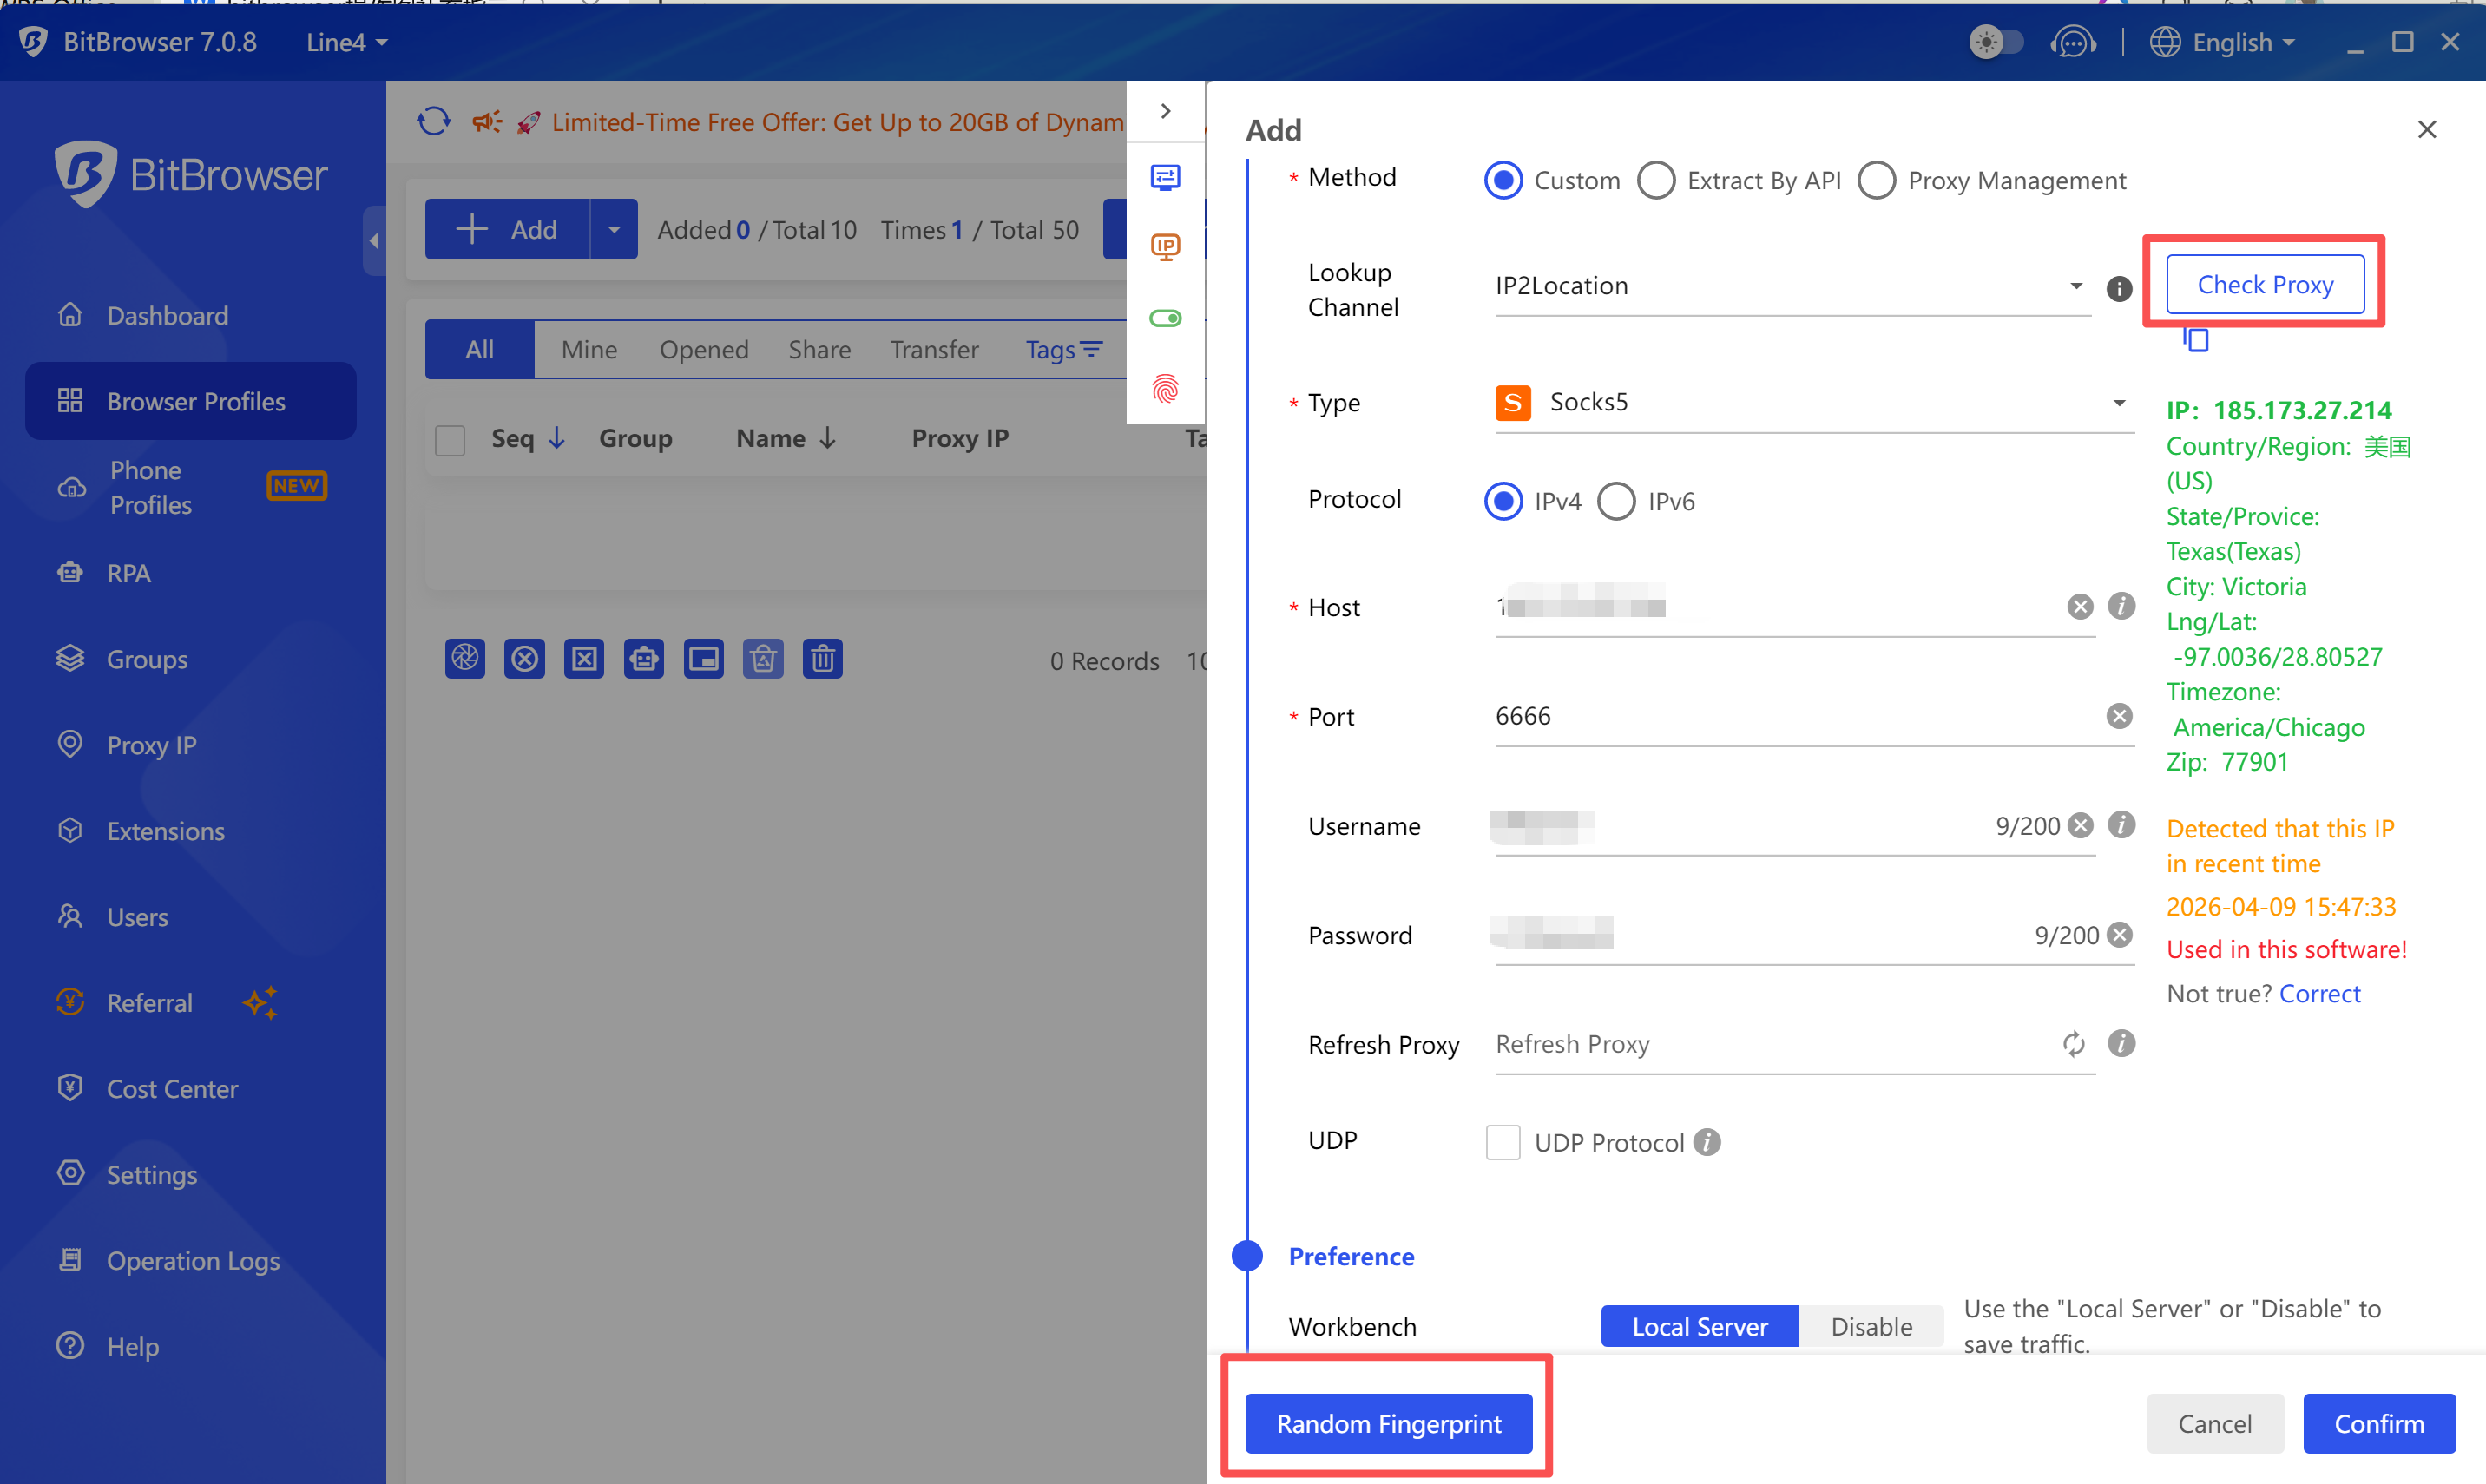
Step 4: Configure Proxy Settings
- In the browser configuration page, find the "Proxy" tab
- Select proxy type:
- HTTP: Suitable for most scenarios
- HTTPS: Requires encrypted connection
- SOCKS5: Requires lower-level protocol support
- Fill in proxy information (example):
Proxy Type: SOCKS5 Proxy Host: dirct.okkproxy.com Port: xxxx Username: your_username Password: your_password
Step 5: Test Proxy Connection
Click "Test Proxy" or "Test Connection" button
Wait for test results
Confirm the displayed IP address and location are correct
Step 6: Save Configuration
- Confirm all settings are correct
- Click "Save" or "OK" button
- Profile creation completed
Usage Tips
- Use an independent proxy IP for each account
- Configure matching fingerprint settings
- Change proxies regularly to improve security
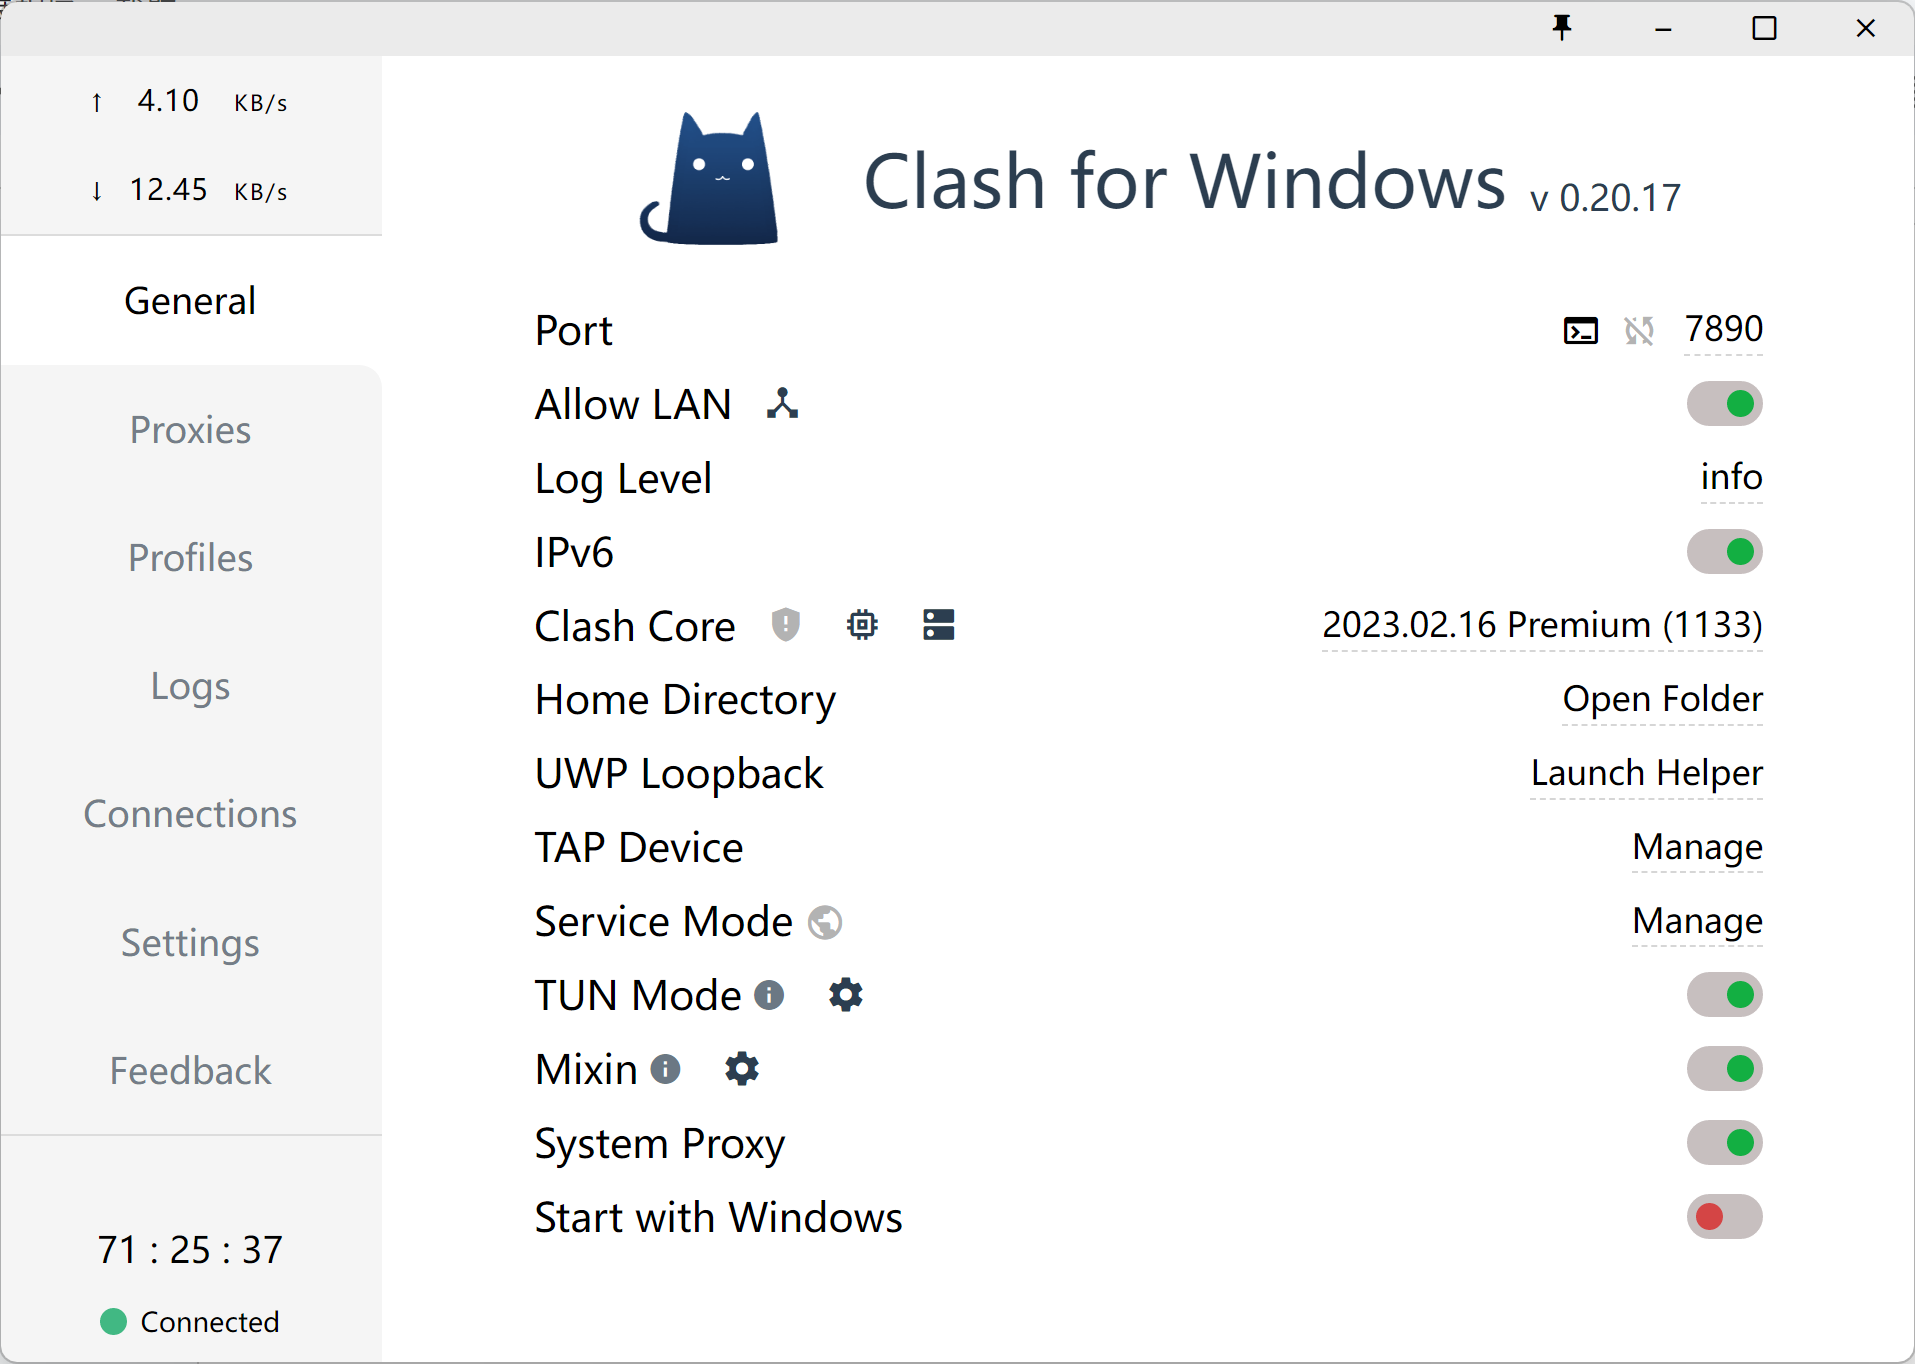
Common Issue in China: Why can't I connect after adding a proxy IP in Bit Browser?
Please make sure you have enabled one of the following tools:
Clash
V2Ray
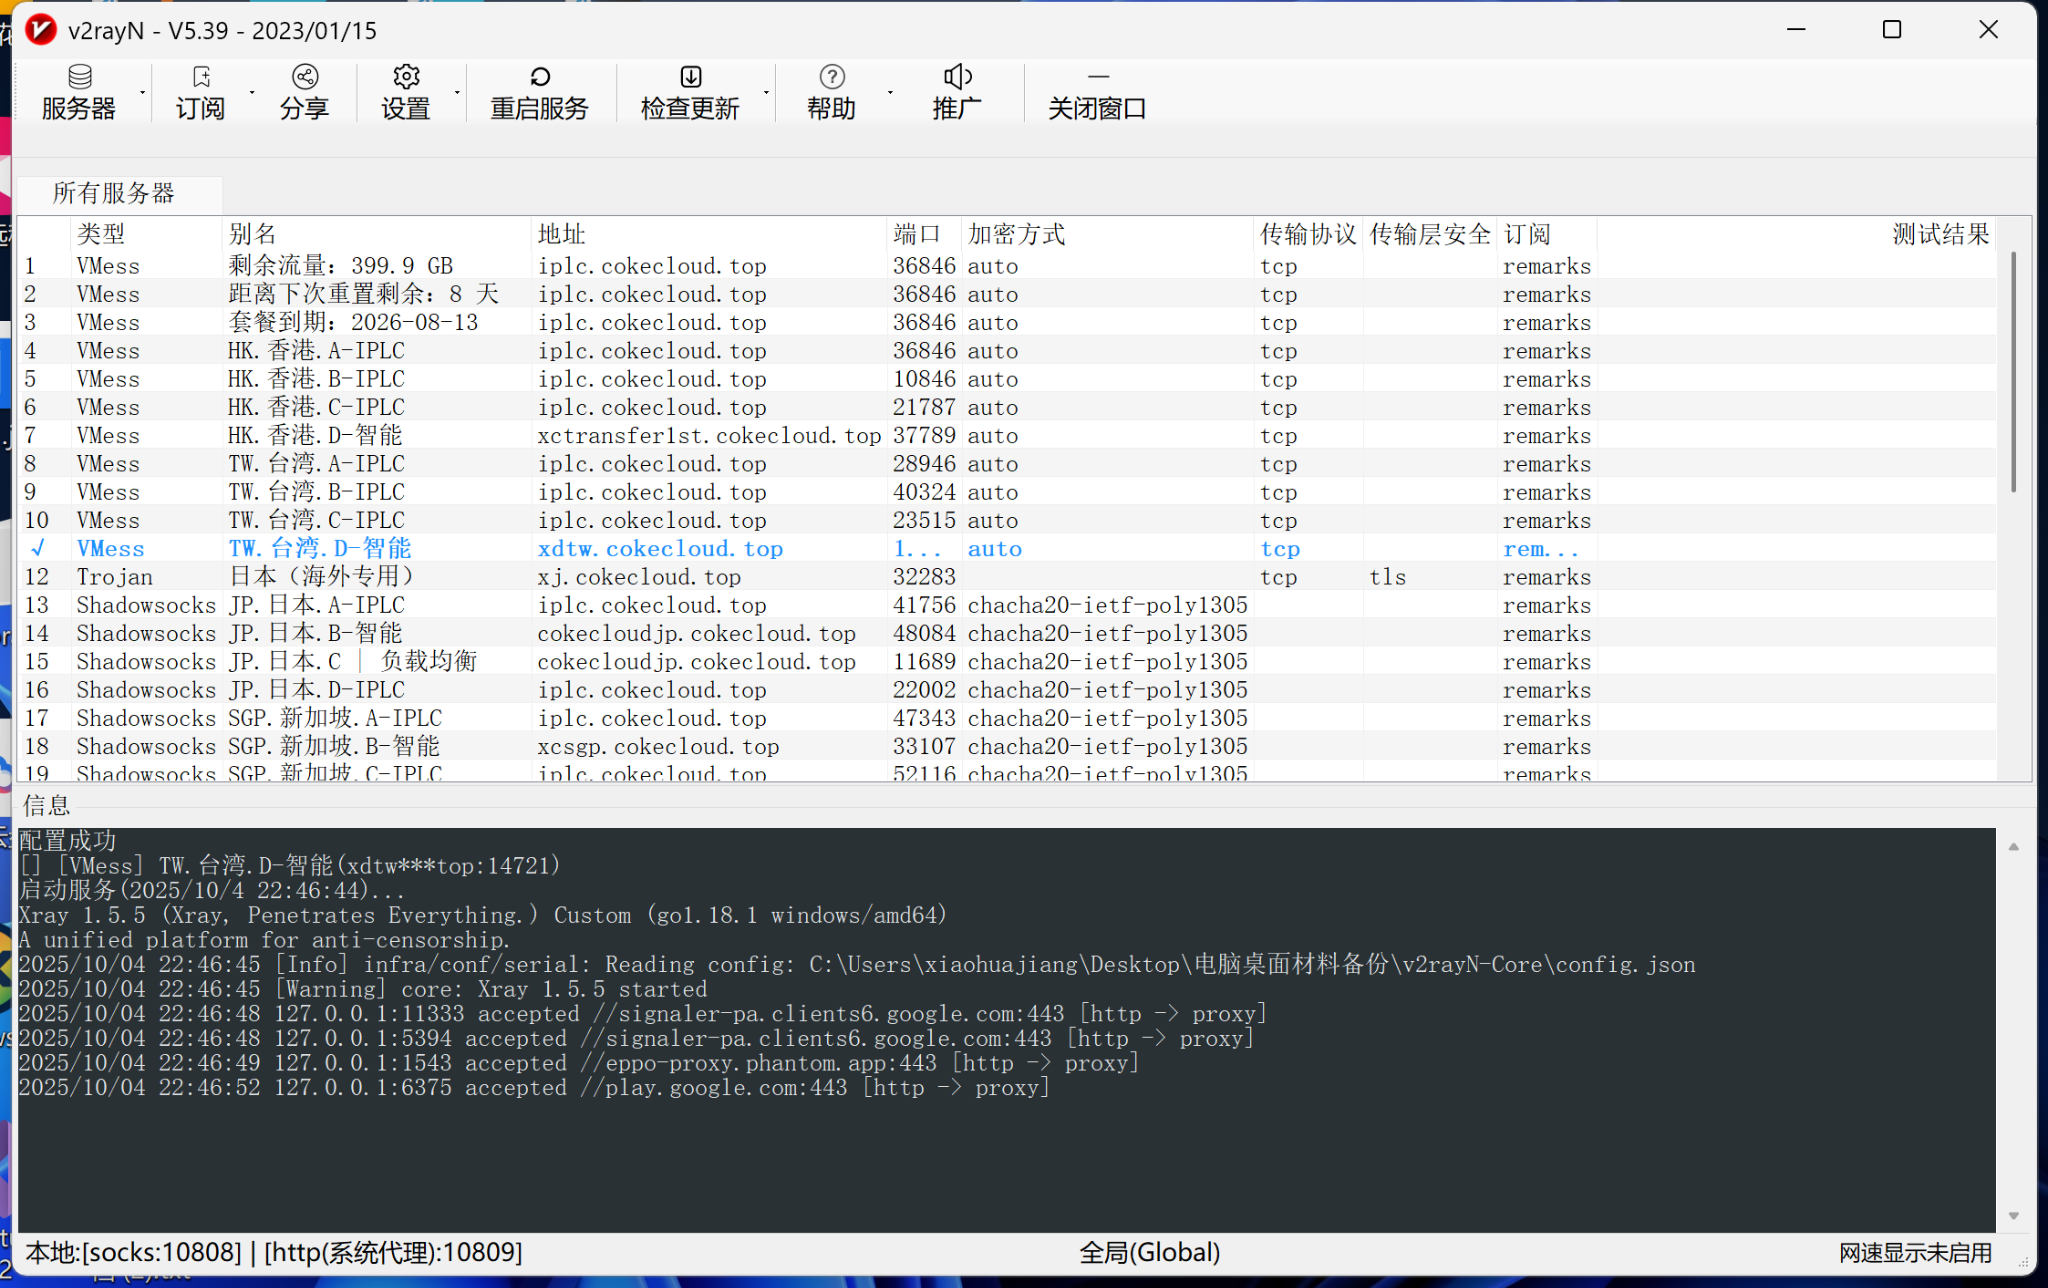
And ensure it is in a “connected” state.